Last Updated: 4/09/2002
This page details replacement of the main 6.5" door speakers in the 3rd generation Acura
Integra. A common problem encountered with this procedure is that aftermarket replacement speakers
usually require more depth than the factory speakers and therefore do not fit in the stock plastic
speaker baskets. In this procedure, the stock plastic speaker baskets are replaced with custom-made
adaptors cut from plywood. To retain the factory units' function of preventing water from dripping
on the speakers, foam baffles are included. It is highly recommended that you purchase a factory
service manual for your vehicle before attempting this type of work. Manuals are available from Helm Inc..
I used a pair of Boston Acoustics CX-6 speakers in my car. Their extra depth required replacement
of the factory speaker baskets. Several other quality speakers are available which don't require
this modification, namely the Eclipse 8263, the Pioneer TS605, and the Clarion SRR1624. A small
review of these speakers is available on InsightCentral.net. Apparently the Insight suffers from the same poor-quality
front speakers as the Integra, and appears to have the same size speaker baskets.
Update: After 6 or 7 years, the plywood I used for this modification
has literally fallen apart. Exposure to moisture over time has caused the laminations to become
unglued. I plan to make some new speaker adaptors out of a different material; currently I'm
considering marine plywood and plastic. Marine plywood would certainly be easier to work with, but
some type of thick plastic would be much more durable and dimensionally stable. I'll keep you
updated.
- Remove the door panels from the car doors. Disconnect the power window harness connector.
- Remove the 6.5" speaker assembly from the door by removing the four screws and
disconnecting its wiring harness.
- Remove the speaker from the plastic basket by removing the three screws.
- Find a piece of plywood about 1/2" thick that is at least as large as both doors' speaker
baskets. Place the speaker basket open-end down on the plywood and trace its outline with a pencil.
Draw a second outline next to it (the adaptors will be identical in dimension).
- Determine from the speakers you have chosen what the manufacturer's recommended mounting hole
size is. My Boston Acoustics speakers had a circle on the back of the box which could be
punched out and used as a template to trace the mounting hole. Trace the mounting hole
circle in the center of the previous tracing.
- Use a jigsaw, bandsaw, scrollsaw, or other suitable tool to cut out the adaptor. It should look
like mine pictured below. If desired, spray paint the adaptor. Drill holes in the corners of the
adaptor in the same locations as the plastic speaker baskets.
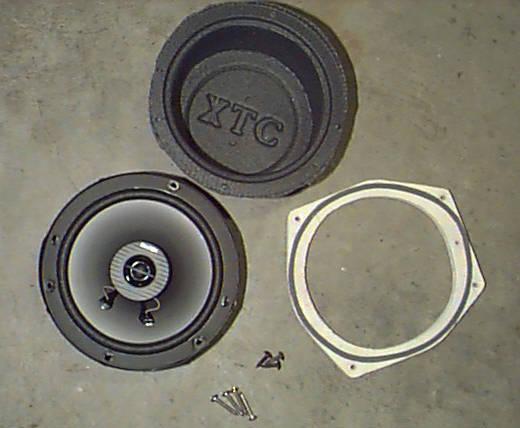
 |
| Parts necessary for replacing speaker |
- To help seal moisture behind the vapor barrier, weatherstripping is necessary between the
speaker adaptor and the door's sheet-metal. The stock speaker adaptors have this molded in, but we
will have to improvise a different solution. Find some thin weatherstripping at the local hardware
store. I used Frost King brand 3/8"-wide EPDM rubber
weatherstripping, splitting it in half lengthwise to make it only about 5mm wide. Clean the
plywood's surface, then attach the weatherstripping as shown above.
- To keep the speaker cones dry in lieu of the factory speaker baskets, obtain some foam baffles
made for 6.5" speakers. I used XTC foam baffles from
Crutchfield. Slide a baffle into
an adaptor, then place the speaker inside. Trim the excess foam from around the rim of the speaker.
Use the three original black screws to screw the speaker through the foam baffle into the adaptor.
- Cut a small hole in the bottom of the baffle below the speaker's terminals for easy access to
them.
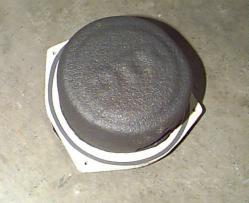 |
| Complete speaker assembly |
- Because of the adaptor's additional thickness over the original speaker baskets, longer screws
are necessary to fasten the speaker assembly to the door. Bring an original screw to the hardware
store and select a stainless-steel screw that has similar diameter and thread spacing, but is about
twice as long. I recommend stainless-steel for its corrosion
resistance. Use four of these screws to secure the speaker assembly to the door after
attaching the wires. Be careful not to overtighten the screws because they are screwing into nylon
inserts in the door. It may be very difficult to replace these if they are damaged from
overtightening.
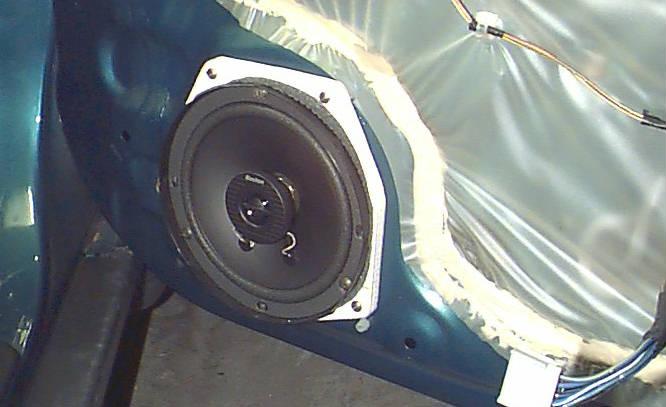
 |
| Installed speaker assembly |