Troubleshooting Instructions for Bixenon Projector Solenoid Controller
If you're having problems getting your system to work, please follow the instructions here.
Visual Inspection of the Solenoids and Wire Harnesses
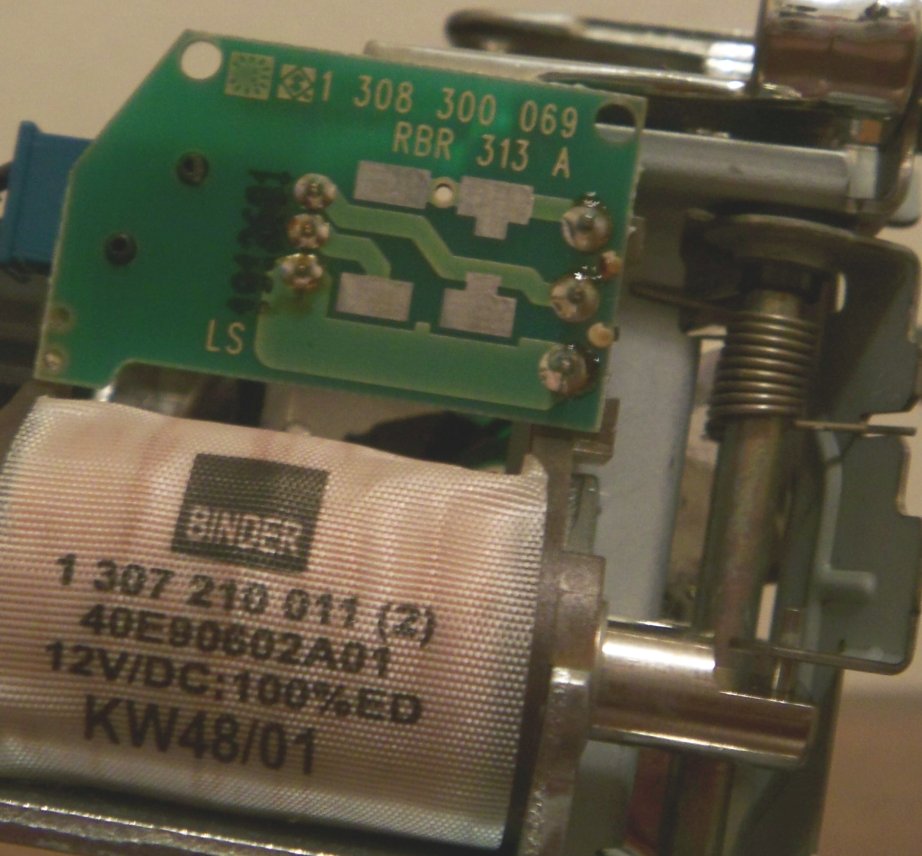
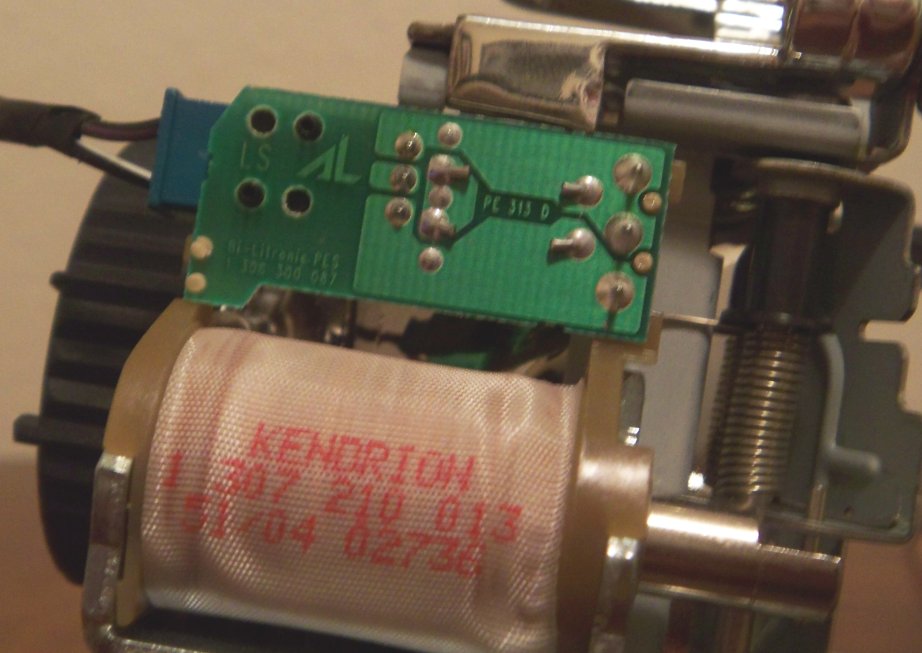
- First, make doubly sure your solenoids have the circuit boards which need these controllers.
If your circuit boards look like the photo on the left below, then you DO need my controllers. If
they look like the photo on the right below, then you do NOT need them.
 |
 |
| Correct Solenoid (needs controllers) |
Incorrect Solenoid (does NOT need controllers) |
- Now, turn your projector over so it looks like this photo, and verify that the wire colors match
those in this photo, and are in the same order, with green nearest the solenoid, and red in the
middle.

|
| Wire Harness Plugged In |
- If your wire harness colors do not match this photo, then you will have to take this into
account when connecting the pigtail harness to the bixenon controllers' B, R, and G terminals. For
instance, if black and red are swapped, then connect black to the "R" terminal, and red to the "B"
terminal.
Testing the Solenoids and Wire Harnesses
- Find a powered-on +12V source, either a car battery, or connection from your car. You will need
two wires from this source, positive and negative.
- Connect the positive +12V wire to the red wire on your solenoids, and touch the black wire to
the solenoid's black wire. The shutter should activate forcefully. Now touch it instead to the
green wire. You might hear the shutter try to activate, but it should be very weak.
- Now, while keeping the positive wire attached to the red wire on the pigtail harness, touch the
negative wire to both the black and green wires, at the same time. The shutter should activate. Now
remove the black solenoid wire, so that the negative wire is only connected to the green wire. The
shutter should remain in the high-beam position (open).
- If this all works, we have verified that the solenoid works, and that the pigtail harness wire
colors are correct. We've also verified the +12V soure and ground are working.
Testing the Controllers
- Hook up a bixenon controller with black in B, red in R, and green in G. Make sure the terminal
screws are well-tightened (but don't go overboard) to sufficiently clamp the wires so they can't
pull out.
- Hook up your +12V source to the - and + terminals, and turn it on.
- If the shutter doesn't activate, try opening the shutter by hand, and see if it stays there. If
you don't have physical access to the shutter, try taking out the black wire, and touch that to the
screw on the G terminal; the shutter should open, and remain open even after you remove the black
wire. If this is the case, the controller is probably bad.
- Test both controllers this way.