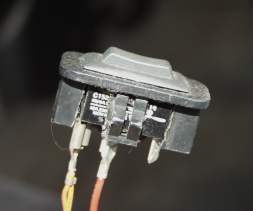
The switches I used are rocker switches meant for home appliances, and are available from your local electronics parts store (but probably not Radio Shack). You might also be able to find some at your local hardware store. I purchased all three at the same time so that they roughly matched.
These switches have many positive features: they have a simple, clean appearance that fits decently with the rest of the car's interior; they have a bezel around the switch which hides any defects in the opening in the surface where they are mounted; and they are simple to install because they just snap into the hole (although epoxy might be helpful for more rigidity), and wires attach using standard spade connectors.
If you're looking for an illuminated switch like the one I used on my foglights, it's very important to find a switch with a bulb designed to be used in a 12V system. Many appliance switches use a 125V neon bulb which is powered by the 125V AC power that is found in houses. Cars use 12V DC, so there is no easy way to light a 125V bulb in a car. Instead, find a switch that has a bulb rated for 12VDC. This bulb can be illuminated just by connecting one of the terminals to ground. Also note that a switch with a 12V bulb may have contacts rated for 125V. This is fine; this just means the electrical contacts are rated for far more voltage than your car has.
The switches I used are made by GC Electronics, which is commonly sold in independent electronics parts stores, or through national distributors.
For the three center console switches in my car, I modified the existing plastic cut-outs to fit the switches. To do this, drill a hole in the center of the insert, then use a file to slowly remove the rest of the material in a rectangular shape the size of the switch body.
As you file away the material, be sure you still have two things on the inside of the cutout: a plastic wedge-shaped piece on one side, and the plastic wall with the metal retaining clip on the other. Both of these shapes are necessary for the cutout to fit back into the hole. Because a lot of the cut-out's material is removed, you might find it helpful to epoxy your switch into place in the cut-out.
Go slowly when filing away the material, so that you don't make the hole too large. If you're unhappy with the way it comes out, however, you can probably find extra inserts at your local junkyard inexpensively, or you can buy them new from one of the OEM Honda parts distributors on my Links page